
TL;DR
This guide details:
- Home Assistant custom integration LTSS with TimescaleDB,
- recovery of data from a postgres database, and
- migration from Home Assistant’s default SQLite database to postgres.
Introduction
For the past year I had been using the Long time state storage (LTSS) custom component for Home Assistant when the virtual machine running TimescaleDB, the time series database server, ran out of disk space. Subsequently the database crashed and would not restart.
More than a years worth of sensor state data from my house is valuable to a geek like me, and so I wanted to recover the data from the crashed database server. A web search tells me there are a few different ways to perform database recovery but I want to share one method that worked for me - a newbie when it comes to database administration - in the hope that it may help another newbie keep their data.
While I’m under the hood of the database server, I’ll upgrade to the latest version of TimescaleDB (PostgreSQL 17) and include PostGIS, which extends the capabilities of PostgreSQL by adding support for storing, indexing, and querying geospatial data.
I’ll also relinquish state data from the Home Assistant container by changing the database used by the recorder integration to the new TimescaleDB database server.
The key components of my approach are:
-
Part 2: How to recover data from the crashed database server to a working database server
- Build a new timescaledb:pg15 database server, the same version as the database server that crashed, but with more disk space.
- Copy the physical database - i.e. the data files - from the crashed server to the newly built database server.
- Start the new database server and let it identify and repair inconsistencies in the database using its built in tools.
-
Part 3: How to upgrade postgres major version
- Use LTSS to create the database schema in timescaledb:pg17.
- Dump the data from the timescaledb:pg15 table into a
.csvfile. - Restore the data from the
.csvto the timescaledb:pg17 database.
-
Part 4: How to change the database used by the recorder integration to postgres
- Use Home Assistant to create the database schema in timescaledb:pg17.
- Connect a container running pgloader to timescaledb:pg17.
- Take a copy of the physical database - i.e. SQLite file
/config/home-assistant_v2.db- from Home Assistant. - Instruct pgloader to load data from the SQLite file to timescaledb:pg17.
In the following guide, all containers are run in rootless Podman on OpenSUSE MicroOS (February 2025) operating system and x86-64 architecture.
Part 1: How to build a new TimescaleDB database server
Home Assistant sensor states are stored as time series database via the custom integration LTSS. We’ll create postgres user ‘ltss’ and database ‘ltss’ in TimescaleDB.
1.1 TimescaleDB quadlet
Use Podman Quadlet to run a TimescaleDB container under systemd in a declarative way
We create three quadlet files:
timescaledb-pg17.containertimescaledb-ha-pg17-data.volumetimescaledb-socket.volume
Later we’ll use Stow to placed them in $HOME/.config/containers/systemd/.
timescaledb-pg17.container [Unit] section
Should be self-explanatory.
timescaledb-pg17.container [Container] section
TimescaleDB image
I will use the official timescale/timescaledb-ha:pg17 container image as it comes with PostGIS and is the latest PostgreSQL version. This is great for x86-64 architecture, if you are on another architecture take a look at expaso/timescaledb images.
TimescaleDB volumes
Volume=timescaledb-ha-pg17-data.volume:/home/postgres/pgdata/data:Z
Volume=timescaledb-socket.volume:/var/run/postgresql:z
Volume=%h/stow/timescaledb-pg17/docker-entrypoint-initdb.d/init.sql:/docker-entrypoint-initdb.d/init.sql:Z,ro
Volume=%h/stow/timescaledb-pg17/conf.d:/home/postgres/pgdata/data/conf.d:Z,ro
Volume=%h/pg-share:/mnt/pg-share:z- “data” creates a persistent volume for postgres data. Note the
timescaledb-haimage does not use the usual location/var/lib/postgresql/data. The:Zsuffix tells Podman to update the SELinux labels. It requires thetimescaledb-ha-pg17-data.volumequadlet file, located in the same directory, to create the persistent volume$HOME/.local/share/containers/storage/volumes/systemd-timescaledb-ha-pg17-data/_data. - “socket” bind-mounts the postgres unix socket in the container to a volume. It requires a
timescaledb-socket.volumequadlet file, located in the same directory. The[Volume]is specified withDevice=tmpfsandType=tmpfs- because why not? init.sqlscript located in the stow package. Postgres will execute the SQL script if it does not detect an existing database, i.e. pre-seed the database on first run. I had permission issues bind-mounting a symlink created bystow, hence the path to the actual file is used.conf.dprovides us with a directory where we can add.conffiles to configure the postgres database.- The final volume mounts a shared directory for importing/exporting
.csvs andpg_dumps. I use Stow with--no-foldingto create the$HOME/pg-sharedirectory.
TimescaleDB Environment variables
Environment=LOCALE=en
Environment=POSTGRES_USER=postgres
Environment=POSTGRES_PASSWORD=WhatHasBeenSeenCannotBeUnseen
#Environment=POSTGRES_DB=ltss
Environment=POSTGRES_HOST=%N
Environment=TZ=Australia/Brisbane
Environment=TS_TUNE_MEMORY="2GB"
Environment=TIMESCALEDB_TELEMETRY=off
I’ll cover some of them, the others should be self-explanatory.
- POSTGRES_PASSWORD should be changed to any jumble of characters
- POSTGRES_DB is not set because
/docker-entrypoint-initdb.d/init.sqlis used to create the databases - TS_TUNE_MEMORY is set to 2GB (the host has 4GB memory) to keep TimescaleDB happy if the cgroup memory resource controller is not delegated to the user runing the container, which is the default for OpenSUSE MicroOS.
TimescaleDB network
#PublishPort=5432:5432/tcpPort 5432 is not published as all database connections are via unix domain sockets.
TimescaleDB health check
HealthCmd=pg_isready -d recorder -U recorder
HealthStartPeriod=120s
HealthInterval=30s
HealthTimeout=1s
HealthRetries=1
#HealthOnFailure=kill
Notify=healthy
Systemd will consider the container healthy when postgres user ‘recorder’ can connect to database ‘recorder’.
Comment out HealthOnFailure=kill until after the data migration is complete, as we are manually monitoring the container’s health for the migration.
TimescaleDB AutoUpdate
AutoUpdate is explained in podman-auto-update(1).
timescaledb-pg17.container [Install] section
The container will start when the user logs in.
Set loginctl enable-linger 1000 to start the container when the host boots and prevent user processes to be killed once the user session completed.
timescaledb-pg17.container [Service] section
Should also be self-explanatory.
1.2 Pre-seed the database
Firstly we’ll prepare a sql script that will create the postgres users and databases. In a later step, it will be bind-mounted into the container at /docker-entrypoint-initdb.d/init.sql.
ALTER SYSTEM SET include_dir TO 'conf.d';
CREATE ROLE ltss WITH LOGIN CREATEDB;
CREATE DATABASE ltss WITH OWNER ltss ENCODING UTF8;
CREATE ROLE recorder WITH LOGIN CREATEDB;
CREATE DATABASE recorder WITH OWNER recorder ENCODING UTF8;
The first SQL statement tells the postgres server to include the configuration files in conf.d. Any parameters declared in these files will override parameter settings in postgresql.conf. Note the order in which these files are loaded is important because only the last setting encountered for a particular parameter while the server is reading configuration files will be used.
For a detailed explanation of how this works see Dockerdocs guide: Pre-seed the database by bind-mounting a SQL script.
1.3 Stow the quadlet files
Use GNU Stow to place the quadlet files in the correct directories using symlinks
We’ll create a new package with a specific directory structure that suits the default Stow settings.
$HOME/stow/timescaledb-pg17
├── conf.d
├── docker-entrypoint-initdb.d
│   └── init.sql
├── dot-config/containers/systemd
│   ├── timescaledb-ha-pg17-data.volume
│   ├── timescaledb-pg17.container
│   └── timescaledb-socket.volume
├── pg-share
│   └── .gitignore
└── .stow-local-ignore$HOME/stowis the stow directory, from where we invokestow.$HOME/stow/timescaledb-pg17is the package directory, Stow will symlink its contents into the target directory.$HOMEis the target directory.
Invoke stow from the stow directory:
~/stow> stow --dotfiles --no-folding timescaledb-pg17The following happens (try it yourself with --simulate --verbose):
- the directories
conf.danddocker-entrypoint-initdb.dand their contents are ignored because they match the regex.+\.dlisted in.stow-local-ignore. - the directories
$HOME/.config/containers/systemdare created (if not already) and symlinks to the quadlet files indot-config/containers/systemdare placed inside. - the directory
$HOME/pg-shareis created but it’s empty becausegitignoreis also listed in.stow-local-ignore
1.4 TimescaleDB is ready to start
The TimescaleDB container image is >1GB so you may wish to podman pull in advance of starting the systemd service.
systemctl --user daemon-reload
systemctl --user restart timescaledb-pg17
podman container logs --follow systemd-timescaledb-pg17
The TimescaleDB container should run the init.sql script and then service’s status will become “healthy” when the pg_isready command is successful.
...
/docker-entrypoint.sh: running /docker-entrypoint-initdb.d/init.sql
ALTER SYSTEM
CREATE ROLE
CREATE DATABASE
CREATE ROLE
CREATE DATABASE
...
[1] LOG:  database system is ready to accept connections
...
1.5 Connect Home Assistant to TimescaleDB
Connect Home Assistant core container to TimescaleDB via Postgres’ standard Unix domain socket
Now that the TimescaleDB container is running, we’ll connect Home Assistant to the databases via unix socket.
LTSS will generate its hypertable when it first connects to the database (as a superuser).
Amend the Home Assistant core quadlet
Add the unix socket to the [Container] section.
Volume=timescaledb-socket.volume:/var/run/postgresql:zAdd dependencies to the [Unit] section. This declaration will start the TimescaleDB container prior to starting the Home Assistant core container.
Requires=timescaledb-ha-pg17.service
After=timescaledb-ha-pg17.service
Add the LTSS integration
Modify Home Assistant’s configuration.yaml:
ltss:
  db_url: postgresql://postgres@/ltss
  chunk_time_interval: 1209600000000
  include:
    domains:
- sensor- The LTSS integration connects to database ‘ltss’ with postgres user ‘postgres’ via unix socket. Later this can be changed to postgres user ‘ltss’
db_url: postgresql://ltss@/ltssbut for the first run, LTSS requires a postgres superuser. - The TimescaleDB
chunk_time_intervalis set to 14 days, but this depends of the number of sensor readings per unit time you record and the system’s available RAM.
You may wish to increase the logging level while you’re editing configuration.yaml:
logger:
  logs:
    custom_components.ltss: debug
Create the ltss database table
Restart Home Assistant.
systemctl --user daemon-reload && systemctl --user restart ha-coreIf you increased the logging level you should see something like the following otherwise if it’s all working correctly the log will be silent.
DEBUG (LTSS) [custom_components.ltss] Connected to ltss databaseNow that the tables have been created in TimescaleDB we could call it a day and keep using Home Assistant but if you have existing data to migrate into the new TimescaleDB databases then we should disconnect Home Assistant from the databases. The easiest way to do this would be to:
systemctl --user stop ha-coreStop home-assistant and revert postgres user to ‘ltss’ in configuration.yaml
Also on the postgres server, change the owner of ltss table to postgres user ‘ltss’ in database ‘ltss’.
...
psql -U postgres -d ltss
ALTER TABLE public.ltss OWNER TO ltss;Part 2: How to recover data from the crashed database server to a working database server
2.1 Create a new database server
For the best chance of successful recovery I’ll build a new TimescaleDB database server that is the same version as the database server that crashed (i.e Postgres version 15). In Part 1 I created the production TImescaleDB container this container will be thrown away after the migration is complete. I wasn’t previously using PostGIS so I can use the light weight TimescaleDB image:
Image=docker.io/timescale/timescaledb:latest-pg15The new database server needs to have more disk space than the server that crashed (i.e. >32GB) so I bind-mount the container host’s $HOME directory:
Volume=timescaledb-pg15-data.volume:/var/lib/postgresql/data:Z
Volume=%h/pg-share:/mnt/pg-share:z
Now start the container and let TimescaleDB instantiate the data directory. Knowing that the container runs successfully at this step may also help with troubleshooting should it be necessary later. The container should be stopped after the disk activity finishes.
2.2 Copy the database
Copy the physical database from the crashed server to the newly built database server
ssh keys for both the crashed server 192.168.107.174 and the container host ha1.localdomain are stored on my laptop hppp, so I used scp to copy the files. Note: I also had to edit /etc/ssh/sshd_config on the crashed server setting PermitRootLogin yes, then systemctl reload sshd.
josh@hppp:~> ssh [email protected]

# systemctl stop postgresql
# exit

josh@hppp:~> scp -r [email protected]:/var/lib/postgresql/15/main ha1.localdomain:/home/josh/pg15-main
2.3 Repair the database
Start the new database server with the physical database from the crashed server and let it identify and repair inconsistencies in the database using its built in tools
josh@ha1:~> systemctl --user stop timescaledb-pg15
josh@ha1:~> sudo chown -R 1000 .local/share/containers/storage/volumes/systemd-timescaledb-pg15-data/_data/
josh@ha1:~> cp -r pg15-main/*  .local/share/containers/storage/volumes/systemd-timescaledb-pg15-data/_data/
josh@ha1:~> systemctl --user start timescaledb-pg15
That’s it. I assume LTSS could now connect to my new database server, with the appropriate pg_hba.conf, but I didn’t try; this container wasn’t intended for production use. Time to upgrade TimescaleDB to pg17.
josh@ha1:~> rm -r pg15-mainPart 3: How to upgrade postgres major version
We need to migrate from timescaledb:pg15 to timescaledb-ha:pg17.
This part cherry picks the single-threaded method in the detailed Timescale Docs article Migrate schema and data separately.
3.1 Dump the LTSS table
Export the data from the timescaledb:pg15 table into a .csv file.
Connect to the timescaledb:pg15 database. Take your pick: podman attach or open the container’s console window in Cockpit. Run psql as root to avoid permission errors.
# psql -U postgres -d ltssLTSS only creates one table by default and its called ‘ltss’.
\COPY (SELECT * FROM ltss) TO "/mnt/pg-share/ltss.csv" CSVOnce the dump is complete we can shutdown this container. I hope you remember how to detach :) ctrl+p ctrl+q
3.2 Create the LTSS database schema
Use LTSS to create the database schema in timescaledb:pg17 database
In Part 1 we used LTSS to create the database schema in timescaledb:pg17. There is no need to migrate any other schema, only data is being migrated. I recommend disconnecting Home Assistant from the ltss database before proceeding.
3.3 Import the data to LTSS
Restore the data from the .csv to the timescaledb:pg17 database
Because I mounted the timescaledb-pg15 volume as described in Part 2 and I mounted the timescaledb-pg17 volume as described in Part 1 the data from the ltss table was dumped into $HOME/pg-share/ltss.csv on the container host and now I can do this:
Connect to the timescaledb-pg17 database - see step 1.
My new ltss table supports PostGIS but my old ltss table did not, so I have to specify which table columns I want copy the data from ltss.csv to:
\copy ltss (time, entity_id, state, attributes) FROM '/mnt/pg-share/ltss.csv' WITH (FORMAT CSV);TIL
3.4 Verify and finish up
- Verify the data is present in the timescaledb-pg17 database.
- Reconnect Home Assistant LTSS integration to TimescaleDB.
- Clean up unneeded files. e.g. the contents of
$HOME/pg-share/.
Part 4: How to change the database used by the recorder integration to postgres
This part is very similar to the excellent blog posts listed below. I’d like to thank these authors as it saved me a bunch of time. I’m keeping this brief.
- Migrate Home Assistant from SQLite to PostgreSQL sigfried.be
- Migrating HomeAssistant from SQLite to PostgreSQL www.redpill-linpro.com
4.1 Create the recorder database schema
Use Home Assistant to create the recorder database schema in timescaledb:pg17
In Part 1 we created a database named ‘recorder’ and a role named ‘recorder’. We use the same unix domain socket from Part 1 to connect Home Assistant to timescaledb:pg17. Add the following to configuration.yaml:
recorder:
  db_url: postgresql://recorder@/recorder
    purge_keep_days: 14
Restart the Home Assistant core container and It should connect to TimescaleDB, create the necessary tables in the database, and start recording data.
If you need to troubleshoot the connection add the following to configuration.yaml:
logger:
  logs:
    homeassistant.components.recorder: debug
If you increased the logging level you should see something like the following otherwise if it’s all working correctly the log will be silent.
DEBUG (Recorder) [homeassistant.components.recorder.core] Connected to recorder database4.2 Copy the physical database
Take a copy of the physical database - i.e. SQLite file/config/home-assistant_v2.db - from Home Assistant
There should be no issues copying the database because, in the previous step, when Home Assistant was restarted with the new recorder configuration the recorder integration stopped writing to the SQLite file.
Copy the SQLite file /config/home-assistant_v2.db from Home Assistant to the container host $HOME/pgloader/ directory. rsync works well as does scp.
4.3 Connect pgloader to postgres
Connect a container running pgloader to timescaledb:pg17
Some items to note from the quadlet file:
Image=ghcr.io/dimitri/pgloader:latesttime is precious, use the prebuilt container.Volume=timescaledb-socket.volume:/var/run/postgresql:zis the unix domain socket to connect to timescaledb:pg17Volume=%h/pgloader/home-assistant_v2.db:/mnt/home-assistant_v2.db:zis where we saved the SQLite file in the previous step.Volume=%h/stow/pgloader/recorder.load:/recorder.load:Z,rois a command file for pgloader.Exec=/bin/sh -c "pgloader --verbose /recorder.load;"starts pgloader when the container is run.#PodmanArgs=-itwill keep the container running when it’s started with systemd. This may be useful for troubleshooting. Use withpodman attach.
recorder.load
The command file recorder.load is very similar to the example in the pgloader docs. It is also easier to read than write:
LOAD database
FROM sqlite:///mnt/home-assistant_v2.db
INTO postgresql://recorder@/recorder
WITH
    include no drop,
    no truncate,
    create no tables,
    create no indexes,
    reset no sequences,
    batch concurrency = 1
BEFORE LOAD DO
    $$ TRUNCATE
        event_data,
        event_types,
        events,
        migration_changes,
        recorder_runs,
        schema_changes,
        state_attributes,
        states,
        states_meta,
        statistics,
        statistics_meta,
        statistics_runs,
        statistics_short_term;
    $$
AFTER LOAD DO
    $$ SELECT setval('event_data_data_id_seq',MAX(data_id)) FROM event_data;$$,
    $$ SELECT setval('event_types_event_type_id_seq',MAX(event_type_id)) FROM event_types;$$,
    $$ SELECT setval('events_event_id_seq',MAX(event_id)) FROM events;$$,
    $$ SELECT setval('recorder_runs_run_id_seq',MAX(run_id)) FROM recorder_runs;$$,
    $$ SELECT setval('schema_changes_change_id_seq',MAX(change_id)) FROM schema_changes;$$,
    $$ SELECT setval('state_attributes_attributes_id_seq',MAX(attributes_id)) FROM state_attributes;$$,
    $$ SELECT setval('states_state_id_seq',MAX(state_id)) FROM states;$$,
    $$ SELECT setval('states_meta_metadata_id_seq',MAX(metadata_id)) FROM states_meta;$$,
    $$ SELECT setval('statistics_id_seq',MAX(id)) FROM statistics;$$,
    $$ SELECT setval('statistics_meta_id_seq',MAX(id)) FROM statistics_meta;$$,
    $$ SELECT setval('statistics_runs_run_id_seq',MAX(run_id)) FROM statistics_runs;$$,
    $$ SELECT setval('statistics_short_term_id_seq',MAX(id)) FROM statistics_short_term;$$
;
It has a couple of differences to the afore mentioned blog posts.
Before load a single TRUNCATE command for all the Home Assistant database tables is given. This seemed to be more successful than using pgloader WITH truncate.
After load all the Home Assistant database sequences are reset. This seemed to be more successful than using pgloader WITH reset sequences.
4.4 Load the data
Instruct pgloader to load data from the SQLite file to timescaledb:pg17.
If the Home Assistant recorder integration is connected to timescaledb:pg17 we should stop the container. This seemed more robust than disabling it via the service call recorder.disable.
Next we start pgloader.
systemctl --user daemon-reload
systemctl --user start pgloader
The container will stop once the load is complete. A successful result will print something similar to this:
             table name     errors       read   imported      bytes      total time       read      write
-----------------------  ---------  ---------  ---------  ---------  --------------  ---------  ---------
                  fetch          0          0          0                     0.000s
            before load          0          1          1                     0.257s
        fetch meta data          0         21         21                     0.174s
      Drop Foreign Keys          0         14         14                     0.037s
-----------------------  ---------  ---------  ---------  ---------  --------------  ---------  ---------
             event_data          0      58227      58227     9.3 MB          4.705s     4.693s     1.808s
            event_types          0         33         33     0.8 kB          4.969s     4.960s
       state_attributes          0     555024     555024   287.0 MB       2m12.412s  2m12.394s    47.098s
            states_meta          0       1480       1480    63.2 kB          0.405s     0.381s     0.032s
          recorder_runs          0         18         18     1.5 kB          0.223s     0.215s     0.002s
        statistics_runs          0       3081       3081   102.3 kB          0.451s     0.427s     0.045s
                 states          0    3407561    3407561   510.2 MB      11m12.563s  11m12.548s   3m4.518s
        statistics_meta          0        437        437    26.8 kB          0.384s     0.361s     0.010s
         schema_changes          0          8          8     0.3 kB          0.312s     0.272s
                 events          0     173826     173826    20.7 MB         30.361s    30.320s     7.121s
             statistics          0    2701545    2701545   215.9 MB       6m57.935s  6m57.881s  1m53.342s
      migration_changes          0          6          6     0.2 kB          0.305s     0.302s
  statistics_short_term          0     831039     831039    66.8 MB       1m56.605s  1m56.575s    35.328s
-----------------------  ---------  ---------  ---------  ---------  --------------  ---------  ---------
COPY Threads Completion          0          4          4                 11m42.840s
    Create Foreign Keys          0          7          7                    21.936s
       Install Comments          0          0          0                     0.000s
             after load          0         12         12                     0.258s
-----------------------  ---------  ---------  ---------  ---------  --------------  ---------  ---------
      Total import time          ✓    7732285    7732285     1.1 GB       12m5.033s
4.5 Verification
Verify that the data migration was successful
Reboot Home Assistant and check that entity state history and statistics are available from the Home Assistant History panel.
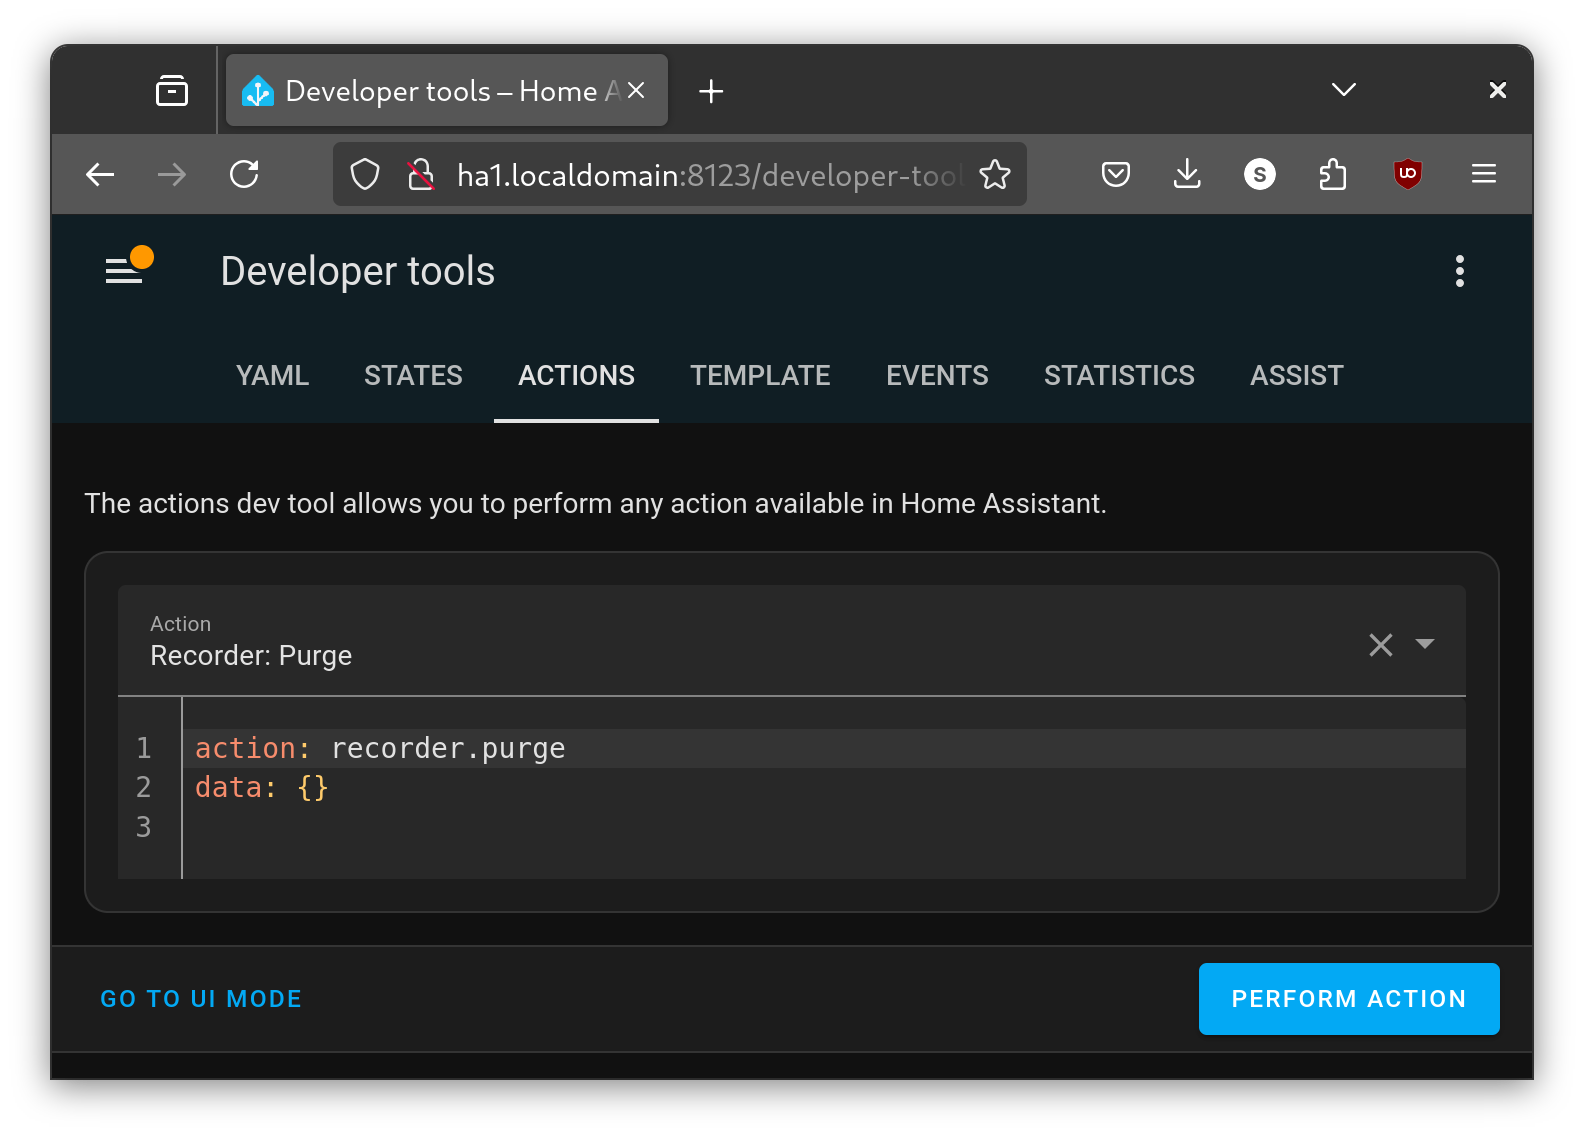
4.6 Purge the recorder
You may get an error in the log similar to Duplicate key value violates unique constraint "state_attributes_pkey". Purging the recorder and restarting Home Assistant will fix any remanant issues from the migration.
4.7 Tidy up
- Return the Home Assistant logger to default settings.
Reclaim some disk space
Assuming that the data in timescaledb:pg17 is adequately backed up - (not covered in this guide, see Future Work) - then we can remove home-assistant_v2.db from both the container host $HOME/pg_share/ and Home Assistant /config/ directories.
We can also remove the pgloader image:
podman image rm ghcr.io/dimitri/pgloader:latestConclusion
We now have both the core recorder integration and the custom LTSS integration saving sensor data to TimescaleDB running in a rootless Podman container connected to Home Assistant via Unix domain socket.
Please leave a comment and let me know if you find this useful. Happy tinkering.
Future Work
- Improving logging on the TimescaleDB server.
- Designing and implementing a backup strategy for sensor state data; that is the TimescaleDB databases.
- Extracting value out of the sensor state data; for example materialised views and graphs.
- Monitoring and managing the storage of sensor state data.
- Securing the TimescaleDB server.
- Setting up web-based management tools for the TimescaleDB database.